Thursday, November 17, 2016

"Teching Up" History Class: The DBQ

Image result for Google sites logoImage result for dbq logo


Years ago, my district had my fellow history teachers and I trained to implement DBQs.  The intent was to help us with the transition the Common Core.  I recall dabbling with DBQs during my student teaching, but since then, I hadn't paid them much attention.  DBQs offer a nice little framework to implement more writing into a history course.

Since I became an EdTech TOSA, I have dreamt of "teching up" the DBQ process.  The DBQs we were using are 100% paper and pencil.  I recall the hassle of making thousands of copies and having to read students' horrible handwriting.  As I have upped my app-tech-pedagogy game, I have come up with a few ideas.

My "teched up" DBQ recipe is a combination of Google Sites and Google Forms. I toyed with the idea of an interactive worksheet (hyperdoc), but I felt that would be limiting for what I am trying to do.  The source documents have good information, but I want more than simply clicking on links.  I want students to click on links for more info and be able do their own research and submit their own links and files.  With the new update to Google Forms, students can now submit files.

Meshing these together in the right manner is my next step.  I envision Sites being the delivery method with Forms as the interactive portion.  I am curious as what other history teacher and EdTech Tosas are doing in this regard. I'd love some feedback as well as your ideas.

Let me know!

Thursday, November 10, 2016

#EDUWin: Google Docs, Screencasting and YouTube in 6th Grade Math


Image result for google docs logo Nimbus Everhelper Image result for youtube logo

Our district has placed a great emphasis on students writing rooted in academic conversations.  As a tech coach, teachers have been scrambling to get me to show them "techie" ways to foster writing and academic conversations without consuming mountains of paper and boring students with traditional pedagogy.

A veteran teacher recently booked me to "tech up" a math lesson.  I am not a math teacher, but her lesson immediately led me to an app smashing recipe of Google Docs, screencasting and YouTube.  After planning the lesson, I did a 10 minute demo of the apps and skills for the students.  Midway through my demo, students were chomping at the bit to get started.  They were stoked to know their expertise on their ratio problems would be posted on YouTube to teach other students.

Once students got started, we hit a snag.  Part of their activity was to collaborate on a written explanation of how to solve the problem on a Google Doc.  In addition, they were to work out each step on a whiteboard and insert a picture of each step into the Doc.  Unbeknownst to me, the camera app was disabled for 6th grade.  As I clamored for a work around, a student got my attention and reminded me that when you go to insert image in Google Docs, you can select "take snapshot" which will use the Chromebook's webcam.

The #eduwin here was how that student was able to solve the problem without the guidance of the teacher. This student empowered himself to take the initiative and be a leader.  With this #eduwin, the class proceeded.  This student went to each group to demonstrate how to access the camera.  By the end of class, nearly all groups had finished their Docs, screencasted their mini lesson and uploaded the video to YouTube.

The teacher was astounded by the level of student engagement.  Students felt empowered in many ways.  Empowerment took the form of them teaching each other as well as providing vital tech support for classmates.
 

Wednesday, November 2, 2016

Doc Hub, Screencasting and ELD


Image result for dochub 

Nimbus Everhelper

For a while now, I have been looking to up my "ELD Game."  I pondered the question "How can I 'tech up' an ELD class?"  When I say "tech up" I am not saying have them merely type on Google Docs or fill in a worksheet digitally on Google Classroom.  "Tech up", in this case, means something more dynamic.  I want something where ELD students are writing, listening, speaking and revising using a variety of tech tools.  After months of pondering, I found a way I can incorporate all of the above.

Students in my district have been using Doc Hub for quite a while now.  Doc Hub allows your to annotate PDF files by drawing lines, highlighting, typing, whiteout and adding images.  I have looked at much of the ELD curriculum, scanned much of it and saved it as PDF files.  Many of the assignments have students do a variety of writing activities.  Using Google Classroom, I would distribute the files to students as PDF.  They would open files with Doc Hub and work individually.

After working individually, students would then be placed into groups of 4 or 5. Students would then take turns looking at each of the group members' work.  They would look for mistakes and provide suggestions for revision.  Students would trade computers with each person in the group until they have seen each member's work.

While looking at someone else's work, they would use Doc Hub's Highlight Tool to highlight mistakes and the Text Tool, to leave notes next to mistakes and suggest ways to revise.  From there, students would use the Nimbus Chrome extension to screencast and explain their suggested revisions.  Nimbus-created screencasts are automatically downloaded to the computer's memory.  When a student returned to their computer, they will see mistakes, suggestions and have 3-4 videos explaining to them how to revise their work.

This activity is useful for ELD students in a number of ways.  They are interacting with the content digitally.  They are processing information and doing peer editing. They are using technology to speak and listen, and they are making revisions based of what they hear and see.

I have yet to teach this lesson, but I am excited to see how it pans out.  This lesson is obviously still in "beta", but I believe it has great potential to both engage and empower students to own and take charge of their learning.  Although I plan to pilot this with ELD, I believe it has many applications for all subjects.

Wednesday, October 26, 2016

#EduWin for 10/24/2016

Image result for twitter  logoImage result for pear deck logo

                                            #EDUWin for 10/24/2016

Monday, October 24 was a momentous day.  I earned a series of small successes with the ability to change educators' views on education and professional development in my district.  

Social media continues to be looked at as more of weapon of mass distraction than as a tool to engage students and grow your Personal Learning Network (PLN).  In recent weeks, I had made some small gains in getting teachers on Twitter to grow their PLNs and connect with other like-minded educators.  These select few immediately began to see the value.

After working with continuation school teachers and setting them up on Twitter, I led a demonstration of Pear Deck.  Teachers were encouraged to leave their phones out and tweet about the session.  A number of them did so, all the while including @PearDeck in their tweets.  

To my delight, that evening, I received a few tweets from the "big-wigs" at Pear Deck thanking me for promoting their product.  As a result of their excitement from the Pear Deck/Twitter demonstration, dozens of teachers signed up to use Pear Deck.  Pear Deck took notice and sent a cordial email letting me know that my session ignited a wave of Pear Deck sign ups.  I quickly forwarded this to one of my principals who immediately took action and is now looking to get a site license for all teachers.  

The magnitude of the #EDUWin is highlighted by the fact that at a past staff meeting, a discussion took place in which many teachers expressed scathing opinions about the role of social media in education.  Within that context, the power of Twitter is clear, as a few simple tweets sparked a series of events that will continue the paradigm shift toward collaborative, connected education in my district and beyond.

Thursday, April 28, 2016

Tech Coach Log 4.28.16: Simple Project Recipe


Simple Project Recipe

There are many of us out there who have a Chromebook cart delivered to your classroom, stare at it and wonder what I am supposed to do with it.  After years of sharing carts, you wonder how to use it for more than searching, word processing and making slides.  For those of you in this position, give this a shot.  This recipe works under the assumption students have access to the apps listed below.

  • Google Sites
  • YouTube
  • Google Slides
  • Snagit Chrome Extension
  • Blogger
I recently used this recipe with 7th grade science students.  In science class, they were learning about biomes or ecosystems.  The teacher sent me the 6 brightest students who were better served to learn on their own rather than in a traditional class setting.  The teacher gave me a list of biomes or ecosystems and asked me to design self-guided learning experience for these students.  With that in mind, I developed this recipe.  This can be done with students of all ability and language levels provided they have been exposed and have access to the apps listed above.  

Step 1: Students were given time to research and take notes, on a Google Doc, about each of the assigned biomes or ecosystems.  They took notes on the characteristics, animals, climate, and locations on the planet.  

Step 2: Students created a Google Slides presentation for all the biomes.  They dedicated 1-2 slides per biome.  The slides included bulleted information, images and embedded YouTube videos.  

Step 3: Students used the Snagit Chrome Extension to screencast themselves "lecturing" over their Google Slides presentation.  Once finished, they uploaded their screencast to YouTube and did some minor editing.

Step 4: Students created a biome blog using Blogger.  They wrote a blog post going into detail describing each biome.  Think of the screencast as the "Reader's Digest version" and the blog post the more in-depth version.  

Step 5: Students created a Google Site where they embedded their YouTube video, presentation and blog.  Each had their own individual page

Step 6: Students emailed the link to their site to their teacher for review.  

This project was done virtually paper free. Some students wrote notes on paper to refer to when they recorded their screencast.  Others used whiteboards.  If you're class is 1:1, this project would be an excellent challenge for both teacher and students.


Wednesday, April 27, 2016

Tech Coach Log 4.27.16: My Favorite Chrome Extensions


My Favorite Chrome Extensions

Chrome extensions make your browsing experience more convenient and help your to be more productive.  Think of them as little backdoors to your favorite apps. This list, in no particular order, displays my favorites and the ones I use on a daily basis.

    • This extension allows me to stream Chrome Tabs to a display connected to Google Chromecast.  No wires necessary.  I use this when I do classroom demo lessons.  I can control the display wirelessly with my Chromebook or mobile device from anywhere in the room.  This conveniently makes my mobile device a remote control.  

    • This extension allows you to split your screen on a Chromebook.  It works on a PC, but is more suited for Chromebooks.  This is useful with students for digital notetaking.  They can open a tab with an article or website and a tab with a Google Doc.  Dualless splits the screen equally so they can read on one side and take notes simultaneously on the other. This can also be used to take notes on a YouTube or online video.

    • This extension allows you to easily take screenshots and have them saved automatically in your Google Drive.  In addition, it allows you to do screencasting.  Screencasting is a great way for teachers to implement blended learning and flipped lessons.  Students can turn their Google Slides presentations into videos and much more.


    • This extension allows you to have a shortcut to open Google Keep just above your bookmark bar.  It simply opens Google Keep in a new tab.

    • This extension allows you to save any website you're on to Google Keep.  It saves it on a note as a link.  You can then add your own notes to it.

    • This extension allows you to save any website, image or part of a website to Microsoft OneNote.  I use OneNote for academic notetaking. When doing research for my Master's, I used this extension to save articles or parts of articles to my notes in OneNote.  This is a great tool for students to do interactive notebooks.

    • This extension creates pop up notifications for Gmail.  In Microsoft Outlook, a pop up notification appears with each email.  This extension does the same for the web-based Gmail.  In addition, by clicking on the extension button, you can view your messages at a glance without having to go to your Gmail.

    • This extension creates pop up notifications for Google Calendar.  In Microsoft Outlook, a pop up notification appears with each calendar event.  This extension does the same for the web-based Google Calendar.  In addition, by clicking on the extension button, you can view your calendar at a glance without having to go to your Google Calendar.

    • This extension shows you how much time you spend on the websites you visit.  This may be helpful in monitoring your productivity.

    • This extension allows you to share web pages directly to students logged into your Google Classroom.  In addition, it provides a convenient back door to launch Google Classroom.  Google Classroom isn't the easiest app to access.  This extension can launch it directly from your browser as long as you are signed into Chrome.
  • Share Desktop!
    • This extension allows you to share your screen with others.  It creates a link for people to click on.  This link shows them your screen.
  • Tweetdeck Launcher
    • This extension simply opens Tweetdeck in a new tab.  
  • Ghostery
    • This extension allows you see who is tracking you while your browse the certain websites.  It blocks them from tracking your movements and clicks.  It does slow your browser down a little bit, but it's interesting to see who is watching.

    • This extension is a companion to the web app AirDroid.  If you have an iPhone, this doesn't apply to you.  If you have an Android, download the AirDroid app, create a free account and log in.  Do the same on your computer in the Chrome Web Store.  This web app allows you to get all your phone notifications on computer.  You can manage phone storage and send/receive texts among many other features.  This extension allows you to receive those notifications no matter what website you are on.

Monday, April 18, 2016

Tech Coach Log 4.18.16 - Help English Learners Access Content with Screencasting and Google Slides


Help English Learners with Screencasting and Google Slides

With our influx of Chromebooks and iPads into our classrooms, we may become overwhelmed and easily lose sight of how to help English Learners.  Not to fear, these devices are great tools for helping ELs access the content.  ELs, like any student, are likely to be more engaged when using such devices.  Here's an idea for engaging the students and helping with language development.

Reading from a textbook or article can be a daunting task for an EL.  Doing an old fashioned read aloud isn't probably a good idea.  Normally, you'd choose a proficient reader to read aloud to the class or even choose yourself.  The logic is that hearing a good example of reading English will help ELs learn better.  True, but if you've ever heard someone speaking a language you aren't very familiar with, you get left behind as you try to translate every word you don't understand. In the end, you are behind.  

Nowadays, most curriculum comes with a digital version of textbooks, articles and auxiliary materials.  What I like to do is take part of my digital textbook and copy/paste the parts I want students to read into a Google Slides Presentation.  The rule of thumb is to have no more than one or two paragraphs per slide.  This way you can have a good size font that is easy on the eyes.  Once you've pasted the text you plan to have students read and follow along, use a screencasting tool.  I recommend Chrome extension such as Snagit or Screencastify.  

When ready, record yourself reading the content.  Be sure to enunciate trouble words.  You may want to highlight them in advance.  Read loud and clear.  When finished, using either of the recommended screencast tools, your video can be uploaded to YouTube where it can be further edited and easily shared with students.  If YouTube is blocked, the screencast tools will automatically save in your Google Drive.  You can share with students from there.  

The purpose of screencasting your read alouds is to give ELs the ability to pause and rewind as needed.  They cannot do that when you do a live read aloud in class.  In addition, you could even add your own commentary within your video to help aid with understanding and comprehension.  This idea works great for ELs and students of all levels.


Friday, April 1, 2016

Snapchat, "Damn Daniel" and Lewis and Clark: Student Project Idea in the Making


For your classroom, what does Snapchat, "Damn Daniel" and Lewis and Clark have in common?

At first glance, you probably think I'm crazy to suggest these three concepts have no connection whatsoever let alone a use in the classroom.  When Snapchat first became a fad, I gave it a shot. After a month, I gave up on it.  I saw no real value in it.  But, while I was at the CUE 2016 National Conference, I suddenly learned the value.  No, there wasn't any sessions on implementing Snapchat strategies in the classroom.  Being 6 hours away from my wife and kids, it became a quick and easy way to stay in touch throughout the day.  I could send short little video clips to my wife and kids and vice versa.  Having small kids who missed daddy, this made life for my wife easier.

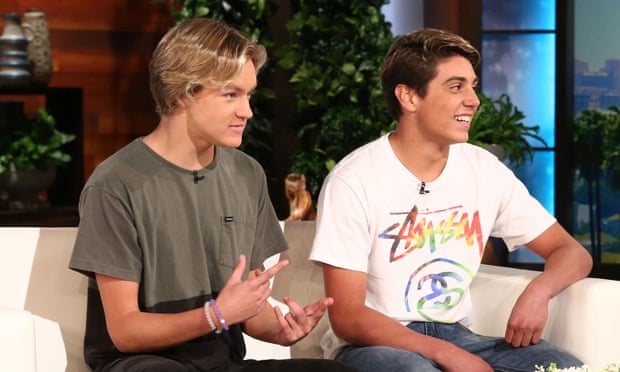
In between sessions at CUE, I was browsing videos on YouTube and came across the infamous "Damn Daniel" boys on the Ellen Show.  The boys explained how their viral videos started just as a joke on Snapchat.  I continued browsing and came across some compilations of the the "Damn Daniel" videos and noticed these videos, like a Snapchat story, chronicle events.  The history teacher in me suddenly came up with an idea? What if historical figures had their own Damn Daniel-esque compilation.  What if George Washington had someone "snapchatting" him at various points of his storied career?  

This led me to Lewis and Clark.  The Lewis and Clark Expedition would be a great way to integrate Snapchat into the classroom. Students could use costumes, backgrounds, props and reenactments and have a classmate "Snapchat" important events during the Expedition.  Instead of "Damn Daniel, back at it again with the white Vans." It could be "Dang Lewis, back at again with the recording of the weather,"  Or, "Dang Clark, back at it again with the discovering of new species."  Or Dang Sacagawea, back it again with the translations."  Students could examine Lewis and Clark's diaries with a "Snapchat" lens.  They could be assigned a predetermined number of events on the Expedition to create "Snaps."  Roles in this activity could be cameraman, actors, editors, etc.  The roles could rotate for each event.  

This is just an idea I came up with and I will be piloting soon with some at risk 8th graders.  

If anyone reads this, and has some input, please feel free to interject.  If anyone is interested in learning more about this, feel free to contact me.

Techcoachjuarez


Tech Coach Log 4.1.16

.

Google Keep for Students: Homework Lists and Reminders

At the beginning of every year, we distribute planners to all students.  After the first month, they usually get covered in graffiti, destroyed or not used at all.  For student planners to be effective, students need to check them constantly and keep them in a safe, convenient place.  This being said, after a month or so, very few students use the planners effectively.  

If we are going to foster 21st century skills, if students have GAFE accounts, we should take advantage of Google Keep.  Google Keep is a great compliment to Google Calendar.  Google Calendar is great for students to input due dates for assignments, especially in a class with Google Classroom.  Google Keep allows students to make to do lists.  These to do lists can be set to remind students at a set time, or, using the mobile app, at a set location.  

Wouldn't it be great for students if they added to their homework to do list throughout the day and it reminded them to do the work as soon as they got home?

Here's how to do it with Google Keep Mobile App.

Here's how to do it with the Google Keep Web App.


Thursday, March 31, 2016

Tech Coach Log 3.31.16


TechSmith Snagit and Uploading to YouTube: Success and Potential Hurdle

We had a small, but satisfying success this morning.  I was working with a class of special needs 7th graders on creating Google Slides presentations.  Once they made their presentation, we had them "lecture" over their presentations to do a screencast using the Snagit Chrome extension.  

Their initial reaction to learning to do a screencast was one of wonder.  I next showed them how to upload their screencast to YouTube. I demonstrated on my end with no difficulty, but the first student who attempted to upload got a notification that they needed to connect their YouTube account.  After a few minutes of troubleshooting, I realized these students have never used the YouTube portion of their GAFE account for anything more than browsing and watching YouTube videos.  I learned they needed to set up their channel's username before having the ability to upload screencasts from Snagit.  

Before having students try to upload, have them go to YouTube and click upload. If it's the first time they've done anything more than browsing and watching videos, they will be prompted to create a YouTube username and choose gender.  Once they do these two steps, they will be able to easily upload to YouTube from Snagit.

When these students received the email that their video was live on YouTube, the look of pride on their faces were priceless.  After watching their own videos on YouTube, a few exclaimed "I am a YouTuber!"

Thursday, March 17, 2016

Student GAFE Account Misuse: My Idea for Dealing with This Issue


In the past year, my district's Chromebook usage and purchases have gone through the roof.  This is a good problem to have.  As expected, we are experiencing growing pains.  As more and more teachers have jumped head first into using Chromebooks on a daily basis, students have learned to use them for learning and, at the same time, transformed them into a weapon of mass distraction.  

As one would expect, the apps most frequently misused are YouTube and Hangouts.  We have had great success using Hangouts as a tool for facilitating academic conversations across classrooms and school sites.  But as you can predict, students will use Hangouts to "communicate" with each other when they should be working.  YouTube, as well, is known for drawing students off task.

Misuse of these apps can make classroom management a nightmare.  Teachers have become frustrated to the point where they want me to disable these apps completely.  With these teacher complaints in mind, I came up with this solution.  I created a "Probation" sub-OU in the Google Apps Admin Console.  When teachers identify students who are "repeat app misuse offenders", they send me the names and I move them into the Probation sub-OU.  When placed into this OU, their account is fully functional except for the "fun apps" such as YouTube, Hangouts, Google Cast, etc.  They can use Gmail, Drive, Calendar, Classroom, etc.  

Since implementing this idea, misuse of the apps have been on a decline.  We have used these misuse incidents as teachable moments for digital citizenship.

Wednesday, March 16, 2016

Blogger Trick for Embedding in Google Sites


As my website, www.techcoachjuarez.com, has evolved, I have looked for ways to integrate this blog on my site.  Not being a code expert or website builder ninja, I stumbled across a simple way to embed this blog onto my site.


Here's how I did it:

  1. Open your blog
  2. Right click in the top margin
  3. Select view page source
  4. The page source code appears in a new window.  
  5. Use CTRL A to select all
  6. Use CTRL C to copy
  7. Open your Google Site and the page your would like to embed your blog
  8. Click the Edit button
  9. Go to Insert > HTML Box
  10. Use CTRL V to paste the code
  11. Click Save
  12. Click Save (blue button) to save your progress and view your blog on that page in your site
This isn't an RSS feed.  It won't update automatically with each new blog post. You will have to repeat this process to update the website with the newest blog posts.

I am sure there is another, better and more efficient way to do this, but this is what has worked for me.

Just an Idea: "Damn Daniel!"


White Vans (shoes) have enjoyed a recent bump in popularity thanks to a couple of teenagers making silly videos.  If you've been online at all recently, it is likely you have "Damn Daniel" ringing through your head.  You've possibly quoted it to your own friends named Daniel.  I know I have.  After watching the viral "Damn Daniel" video, the creative history teacher in me got to thinking.  How could I adapt this to the classroom?

This could be a very engaging activity for students if we had them make a "Damn George" video about George Washington during the Revolution or "Damn Abe" video about Lincoln's presidency.  How about making a "Damn Thomas" video about Edison's inventions?  It would go "Damn Thomas, back at it again with the inventions." I could go on all day.

This could be an easy way to marry technology and history content.  Students could be very creative.  Students could select a series of 5-10 events in the life of a historical figure and pretend to follow them around with a camera shooting 5-10 second clips.  Students would have to create backgrounds, props and costumes. Another way could be have students piece together already made clips of the figure and do the "Damn [insert name]" voice over.

This is just a thought I had.  I am looking forward to experimenting with it soon.

Thursday, March 10, 2016

Tech Coach Log: 3.10.16


Chromecast EDU


In my house, I have two Chromecasts.  One is upstairs in my man-cave and the other is in my daughters' playroom.  The ability to stream YouTube, pictures, MLB.TV, WatchESPN and many other apps is so convenient and fun.  As I have enjoyed this little "dongle" at home, I have developed ideas for classroom application.  Here is what I have come up with so far.  This list is in no particular order.

  • Use a VGA to HDMI adapter to transform old monitors into digital signage in your classroom.  Save images of content and or student exemplars to your Google Photos account (free and part of any GAFE account).  Chromecast can be set to display images in a Google Photos account when not streaming an app.
  • Have students create a presentation, for any subject, with Google Slides.  Use the Chromecast Chrome extension for students to stream their presentation to the projector without having to "hijack" the teacher's computer.  If you trust your students, they can do the same with their mobile phone or iPod as long as they have the Google Slides app.  They can use a mobile device as a wireless remote.  In addition, when they create the presentation on a PC or Chromebook, they can add speaker notes which are easily seen on the mobile device when presenting.
  • In a math class, have students in groups or as individuals work on problems with an old fashioned whiteboard.  With the webcam on a Chromebook or PC, have students take a picture of their whiteboard.  They can then stream their picture to the projector screen for whole class error analysis.
  • A YouTube Scavenger Hunt (that's what I call it) is a fun way to do a jigsaw. Assign small groups topics from a section of curriculum the same way you would do a jigsaw.  Challenge each group to find a video, 4 minutes or less (teach them to filter search), that concisely describe the topic.  Have each group stream their video during the share-out portion of the exercise.  This can be done as an opening activity or review.  Be sure to approve videos before having students stream.


Tuesday, March 8, 2016

Tech Coach Log: 3.7.16


In our district, academic conversations is a major focus.  Students often lack the skills and or confidence to hold an academic conversation.  Any tool that can make students more comfortable communicating is welcomed.  Once students become more comfortable communicating, we are a step closer towards getting them engaged in academic conversations.

Students nowadays are adept at texting, instant messaging and "Facetiming".  With that in mind, why don't we put those skills to work for us?  We can use these skills as way of getting students started with academic conversations.  

Students may feel uncomfortable, at first, speaking, but they may be comfortable texting.  If we can get them to have an academic conversation via text, it can increase their level of comfort to eventually have a verbal academic conversation.

Some of my ELA 7 teachers have begun having students start academic conversations using Google Hangouts.  We started them with the instant message/texting function of the app.  After some practice, we paired them with other students on the other side of the room and they used the video chat function to have an academic conversation.  Recently, two ELA 7 teachers paired students with students from the other class and they used the video chat to have an academic conversation.  

Early returns are promising and we are looking to involve more teachers and subjects.  Many students who normally won't speak academically in class are fully participating when using Google Hangouts.  Hangouts has become a method of engagement.  

Monday, March 7, 2016

Tech Coach Log: 3.4.16


Google Drawings and Memes

When I was in the classroom, I completely embraced the "meme movement". Memes are captioned images intended to be clever, witty, funny and or sarcastic. When I first saw them, I immediately saw them as a great way to get students to think critically and creatively.  I challenged students to take the "boring history facts" learned in my class and use them as fodder for creating captions on memes. 

At first, they were hesitant and not very good, but as time went on, the students' creative juices began to flow.  I printed the best student memes and displayed them on the wall. At one point, you could walk into my room and get the jist of what we just learned by looking at student memes.  Test review was no longer done with PowerPoint and study guides.  I simply displayed memes from the chapter/unit and students would discuss the image and caption.  It was amazing to see how the memes jogged their memories.  Instead of recalling facts, they discussed and explained concepts and themes.

Usage of memes is a great way to engage students and inject some creativity into their work.  It is a great first step towards fostering critical thinking.  Google Drawings is an excellent tool for generating memes.  It is part of any Google Account and student memes are conveniently saved in Google Drive.