Wednesday, October 7, 2020

New Quizizz Lesson Feature

Anyone who knows me knows how much I love Quizizz. It's my favorite way to do informal formative assessment. I love using it as part of the Fast and Curious EduProtocol. I use it weekly to build vocabulary. Not too long ago, Quizizz unveiled a new, beta feature that allows you to teach an interactive lesson. The lesson feature is similar to what you can do with Pear Deck. 

You may be thinking, why not just use Pear Deck? I could use Pear Deck, but as a frequent user of Quizizz, my students are comfortable with Quizizz and running interactive lessons through Quizizz allows me to facilitate on a format in which students are familiar. In a distance learning environment, it's a good idea to not overwhelm students with too many platforms and apps. Quizizz can help with that by being a platform for CFU, formative assessment, vocab practice and lesson delivery. 

Below is a series of screenshots that shows you how to get started using the Quizizz lesson feature.

Step 1: Login to your Quizizz account and click Create


Step 2: In the dropdown menu, choose Lesson. (It's currently in Beta so it will be getting new, improved features as time goes on.)


Step 3: Similar to creating a Quiz on Quizizz, enter the Lesson Title, choose your subject and click Next.


Step 4: After clicking Next, you'll taken to the Quizizz slides builder. Click Add slides in the bottom left corner.


Step 5a: You can choose from a variety of templates and interactive question types.


Step 5b: If you want to create your slides in Google Slides or PowerPoint, you can import them. This is what I prefer to do. You will need to download your slides as a PDF in order to import into Quizizz. Below you see an example with Google Slides. PowerPoint has a similar option.


Step 6: When the PDF of your slides has been uploaded, you will be able to pick and choose which slides you want to use. Pick some or all.


Step 7: Your slides will appear in the Quizizz slides builder. The imported slides are static and cannot be edited as they are images of your pre-made slides from Google Slides or PowerPoint. You can add other slides using the Quizizz templates or inject CFU and reflection questions in between your slides.


Step 8: If you add questions (My favorite part of using Quizizz lesson feature.), you can choose from Multiple Choice, Checkbox, Fill-in-the-blank, Poll or Open-Ended. Whichever type or types you choose to use throughout your lesson, you will get a report at the end with all student responses. 


Below are some screenshots of the different question types you can add in between your slides.

Multiple Choice


Fill-in-the-Blank

Poll


Open-Ended

The following screenshots show the basics of facilitating a lesson using the Quizizz lesson feature.

Step 1: After setting up your slides and questions, open the lesson from My library. Click Start a live lesson. For Asynchronous work, choose Assign homework.


Step 2: Choose your settings and click Present.


Step 3: After clicking Present, this screen below will appear and students will join with the code. Every time you use this lesson, there will be a different code. Remind students to use their real first and last names. The report of student responses at the end can be used for participation points, formative assessment and other grading purposes. Click Start when ready. If a student needs to join late, the code will be pinned at the top of the screen by default.


Step 4: When your first slide appears, you will see a control panel on the bottom left that allows you to navigate through the slides.


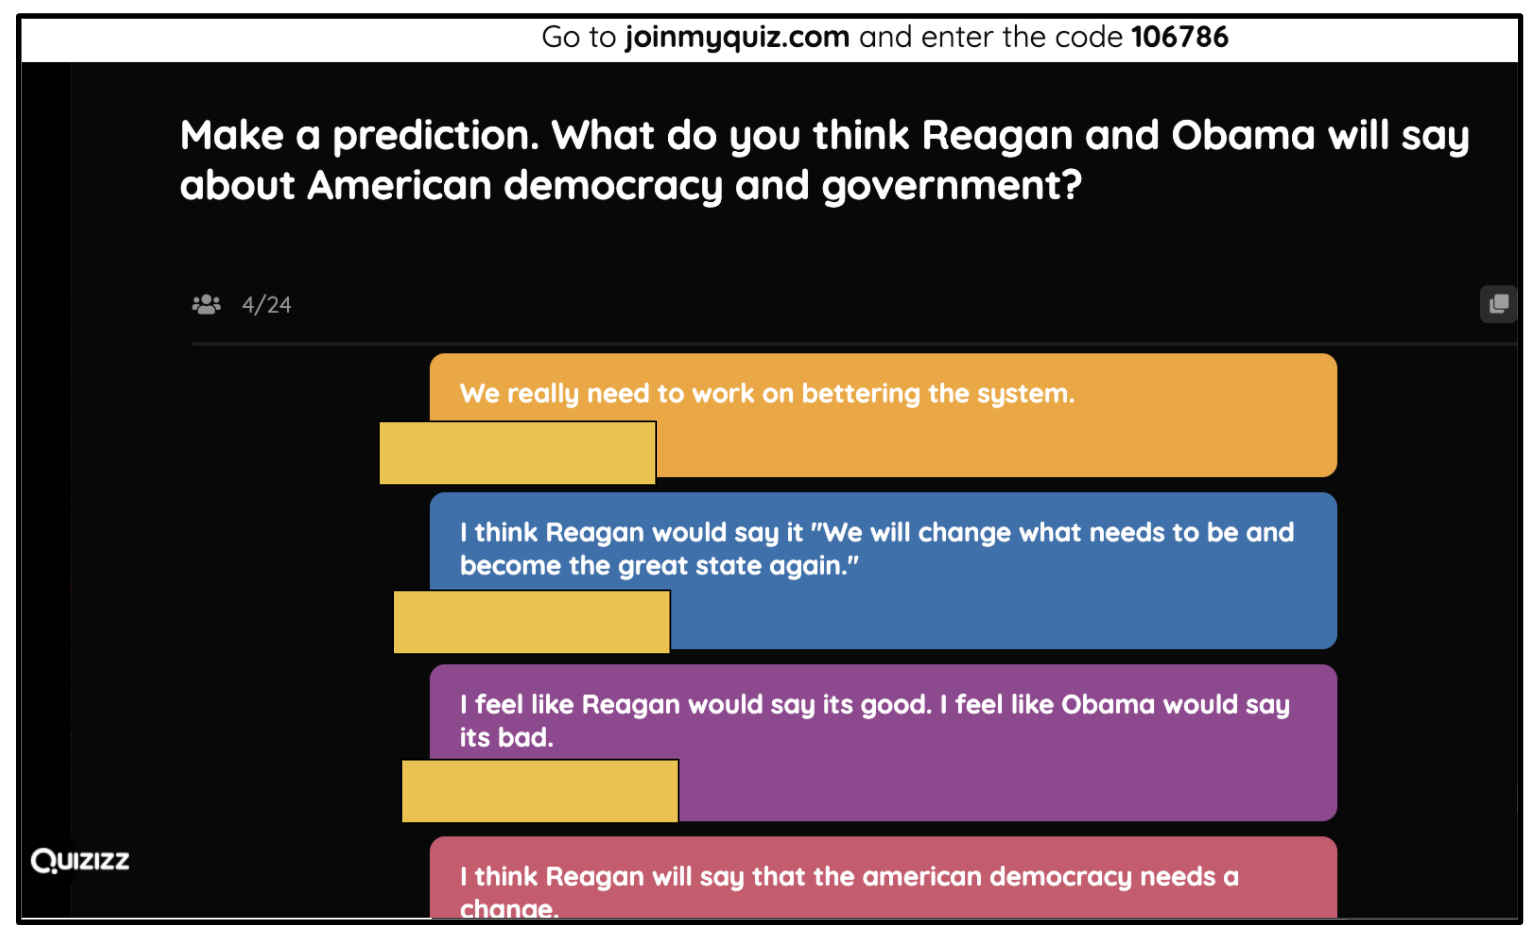
Step 5: When you come to a Question slide, there will be a three second countdown and students will be able to answer the question on their end. On your end, you will see student responses appear on the screen as they are submitted. These can be hidden.
 

Step 6: When you get to the end of your lesson, you will see a leaderboard just like when you do with a quiz in Quizizz. To see the results and student responses for each question, click the View reports button.


Step 7: The screenshot below is an example of what the report will look like. It can be downloaded as a spreadsheet for PLC and data analysis purposes by clicking the Download button on the right side. You can see the data by Participants' scores, Question by Question, Overview and Topics (if you added topics to your questions).


If you have any questions and would like a follow up, contact me via Gmail or Hangouts at ajuarez@techcoachjuarez.com. If you would like to unsubscribe from this blog, go to bit.ly/tcjinbox.

My book, The Complete EdTech Coach: An Organic Approach to Digital Learning, co-authored with my wife Katherine Goyette is due out in October/November of 2020. It will be published by Dave Burgess Publishing. Keep an eye out on this blog and on social media. Be sure to follow the hashtag #OrganicEdTech and #CVTechTalk for updates.


Screenshots Rock: How to on a PC, Chromebook and Mac


Distance learning has forced teachers to create more digital content than ever before. Designing digital lessons and learning experiences often makes use of your computer's screenshot function. Screenshots are very useful when jazzing up slides, pulling selected text for analysis, sharing error messages with IT and much more. If you're reading this blog post, it's highly likely you already know how to screenshot, but please share this with colleagues who still need to learn. Below, you will see how to screenshot on a Chromebook, Mac and PC.

This is also an important skill for students to learn. Most already know how to screenshot on their mobile phones, but not as much on a computer. As an edtech coach, I get numerous emails daily about error messages and other notifications from students. To best troubleshoot and problem solve, I ask them for a screenshot. When they send me a screenshot, I can better assist or pass on to IT for them to know exactly what the problem is.

Chromebook

On a Chromebook, screenshots are easily done through a simple keyboard command. For a screenshot of the entire screen, simultaneously hold Control+Show Windows Key. To screenshot a selected piece of the screen on a Chromebook, simultaneously hold down Command+Shift+Show Windows Key. Your cursor will appear as a "cross" then click and drag across the area you want to screenshot. The image below shows you the buttons needed for screenshots on a Chromebook.


On a Chromebook, when you have done a screenshot, you'll see a pop up in the bottom right corner of the screen that gives you options to Copy To Clipboard or Annotate Image. If you click Copy to Clipboard, you can paste that screenshot on a Doc, Slide, Drawing, etc. If you click Annotate Image, you'll be taken to a new window where you will be given some basic tools to draw on the image before saving to the Chromebook's files.


If you were to dismiss the pop up (above) or click the "x", the screenshot will automatically be saved in the Chromebook Files app. When you open the Files app, you will find the screenshot in Downloads.


Mac

On a Mac, the process is very similar. The keyboard shortcut is Command+Shift+4 to select a part of the screen and Command+Shift+5 to screenshot the entire screen and or start a screencast. If you use the Command+Shift+4 option, like the Chromebook, a "cross" will appear for you to use to select the area of the screen. The image below shows you how. By default, screenshots are automatically saved on the Desktop.


PC/Windows

If you are working with one of the most recent models of Windows, you can use the keyboard shortcut Win+Shift+S to activate the Snip and Sketch tool. Older versions will have you use the Snipping Tool. On this post, I am demonstrating the most current version of Windows using the Snip and Sketch Tool. This will allow you to screenshot the entire screen or select a specific part. 


Whichever you choose, when you are done making the screenshot, a pop up will appear in the bottom right corner. 


If you click the pop up, the Snip and Sketch Tool will pop up in the center of your screen. You will see a variety of tools you can choose from to mark up the image if you so choose. There is a pen, pencil and highlighter tool in addition to an eraser, ruler, cropping tool and Save button.


When you are ready to save your screenshot, click the Save button. It will be saved in the Pictures folder of your computer. When you click it, what you see below will pop up and you will be given the option to rename and or move the file.


If you prefer not to use the keyboard shortcut, you can always access the Snip and Sketch Tool by clicking the Windows button in the bottom right corner of the screen and selecting it from the list of apps and programs. 


It can also be pinned to your Taskbar for quick access in the future. When the Tool is open, you'll see it on the Taskbar. Right click on it and select Pin to taskbar. 


If you have any questions and would like a follow up, contact me via Gmail or Hangouts at ajuarez@techcoachjuarez.com. If you would like to unsubscribe from this blog, go to bit.ly/tcjinbox.

My book, The Complete EdTech Coach: An Organic Approach to Digital Learning, co-authored with my wife Katherine Goyette is due out in October/November of 2020. It will be published by Dave Burgess Publishing. Keep an eye out on this blog and on social media. Be sure to follow the hashtag #OrganicEdTech and #CVTechTalk for updates.


Tuesday, October 6, 2020

Coaching at a Distance: 4 Ways My Coaching Has Evolved in Distance Learning

Distance learning has turned our world, education in particular, upside down. My job as an edtech coach looks much different than it did before March 13, 2020. A term that has gone viral since then is "new normal". I am not a fan of that term. I prefer to use the term "new temporary". Much of what we have done in the last six months have been reactionary to the situation. They are temporary changes, but many of these changes will have long lasting effects on how we do our jobs when things go back to "normal". 

Pre-COVID, as an edtech coach, I prided myself on being a "walking coach". To best serve my teachers and students, I walked classrooms daily to observe teachers and students in their natural habitats. On my visits, I left observed and left feedback. Click here to learn more about being a "walking coach" by registering for virtual Fall CUE and checking out my (with my wife Katherine Goyette) edtech coaching sessions.

My observations powered my coaching. Since the shutdown and move to distance learning, my coaching looks markedly different. Many of the adjustments I have made are temporary while others will continue to affect the way I coach. Below are four adjustments I have made in distance learning that aren't temporary. Each adjustment can be synthesized for the needs of admin and other instructional coaches.

Admin Google Classroom

Before the shutdown, administrators and coaches in my district, and across the world, made a habit of visiting classrooms to leave feedback for teachers and see students engaged in learning. COVID has definitely changed how admin and coaches do this. One way my schools have pivoted is by creating an "Admin Classroom" account for the site administrators. 

Early on, teachers shared "co-teacher" rights in their Google Classrooms with admin and coaches. This allowed admin and coaches to pop in on Classrooms to see pedagogy and student work while leaving feedback to students and teachers. Quickly, we realized teachers adding coaches and admin as co-teachers is a logistical nightmare on the part of the admin. Their Google Classrooms and inboxes quickly became overrun with information, assignments and notifications.

To remedy this, I created a separate "Admin Classroom" account for the site admin to share. Teachers added the "Admin Classroom" account as a co-teacher. As teachers added this account, as tech coach, I went in and organized the hundreds of Classrooms alphabetically by teacher last name and class period. The site admin simply login to Chrome as this account and go to Google Classroom when they want to do virtual walkthroughs.

Setting this up for my school sites was a little bit time consuming, but definitely worth it in the end. This just one example of how edtech coaching has evolved in distance learning and elements of this evolution will continue as we transition to a hybrid model and back to face to face.

Blog & Email

Social distancing has made it impossible to meet one on one with teachers they way I used to. Video calls on Google Meet or Zoom are helpful, but not always convenient. Teachers don't always have time to jump on a video call. A more convenient way of getting support and new ideas is to read a coach's blog. 

Since the beginning of distance learning, I have received countless emails for "how-to's" and other ideas to improve student engagement and workflow. As each request for support comes in, I have done my best to write blogs addressing teacher needs. The blog has become a living, evolving resource for teachers to refer to. In addition, I copy and paste each new blog post into an email to teachers. Those who cannot meet during on-call video hours, or find time to go to the blog site, can pick up some support and new ideas in their inbox. 

Below is a screenshot of my Cardinal Innovation Center Blog. This blog houses all the requests, support and new idea blog posts. Teachers can access it at cardinalinnovationcenter.org and in their inbox when a new blog post is published. 


Coach On-Call Video

Due to social distancing regulations, meetings with teachers or groups of teachers have to take place virtually. Before the shutdown, teachers knew when I was available in my learning space to come get face to face, one on one support. Those physical office hours have now gone virtual. In Google Calendar, I scheduled 2-3 blocks of time daily where I am available on Google Meet. All teachers have been invited to the recurring Calendar invites. All they need to do is open their Calendars and click the link on the event. In addition, I schedule emails to go out each morning with a greeting and the Meet link as a reminder for teachers. 

In between classes or on their prep periods, teachers can get some virtual, face to face support. What has made this surprisingly effective is having teachers share their screens with me. This allows me to walk them through, step by step, different tools, apps and strategies. Often times, in person, teachers would ask me to show them on their computer. With screen share, they are the ones doing the work under my coaching and supervision. This seems to be more effective.

Answer with a Screencast

One of my go-to coaching sayings over the years is "answer emails with a screencast". As an edtech coach, many emails I receive are asking how to do something. If I don't have a how-to video already made, I make a quick screencast and reply to the email with the video. Usually, I post the video on YouTube and send the link

In my experience, people don't always want to have to click on a link to be taken to a video. About a year ago, I stumbled on a great Chrome extension by Cloud HQ that allows me to embed YouTube videos in the body of an email. Being able to see the video without leaving the email has led to an increase in teachers viewing my videos.

Below is a step by step guide getting started with Cloud HQ's Embed YouTube Videos in Gmail Chrome extension.

Step 1: In the Chrome Web Store, search for "embed YouTube video Gmail".


Step 2: Click Add to Chrome.


Step 3: Click Add extension


Step 4: Be sure to click the "white puzzle piece" button to pin this extension to your browser. The button appears as a YouTube logo amongst your extensions.


Step 5: When installed, you'll see a "Cloud HQ" logo next to your Help and Settings button in Gmail.


Step 6: When you compose an email, you will see a YouTube button next to the Send button. This is what you click to embed a YouTube video in your message.


Step 7: After clicking the YouTube button on your message, this will pop up. Click the bar that says My videos.


Step 8: From the menu that appears, choose All videos.


Step 9: After clicking All videos, in the bar below, paste the URL/Address of the YouTube video you want to embed. When it appears below, click it.


Step 10: The video will then appear in the message


Step 11: This screenshot shows what it looks like on the recipient's end. All the recipient has to do is click the play button on the video and it will play within the message without having to open a new window and going to YouTube.


If you have any questions and would like a follow up, contact me via Gmail or Hangouts at ajuarez@techcoachjuarez.com. If you would like to unsubscribe from this blog, go to bit.ly/tcjinbox.


My book, The Complete EdTech Coach: An Organic Approach to Digital Learning, co-authored with my wife Katherine Goyette is due out in October/November of 2020. It will be published by Dave Burgess Publishing. Keep an eye out on this blog and on social media. Be sure to follow the hashtag #OrganicEdTech and #CVTechTalk for updates.


Thursday, October 1, 2020

New Jamboard Integration with Google Meet


Just last week, I wrote a blog post about a bunch of new features recently added to Google Meet. Those features included background blur, ability to view 49 participants and more presenter controls. One feature that had not come yet was Jamboard integration. But a long last, Jamboard integration in Google Meet is here. If it hasn't rolled out to your domain yet, it will any day. 

I am very excited for this feature. One easy way to take advantage of this is if you have a touchscreen device with stylus. I envision math teachers using this for guided practice, ELA teachers demonstrating text marking, and history & science teachers annotating maps and diagrams. The possibilities are exciting. 

Take a look at the screenshots below to see how to get started using Jamboard integration in Google Meet.

Step 1: Click the "three dots" in the bottom right corner. At the top of the menu that appears, you will see "Whiteboard" as an option. Click it.


Step 2: Once you click "Whiteboard", this will pop up giving you the option to start a new Jam from scratch or choose one you've already pre-made in Google Drive. 

Step 3: If you've invited people to your Google Meet video call, this will appear asking you to give access to the file. You don't have to give them access if you're going to use it just for a guided practice or demonstration. For that, click the "Don't give access" box in bottom left of the pop up. Whether you give access or not, you have to click send. A link to the Jam will appear in the chat regardless if you gave access or not.

Step 4: When the Jam opens in another tab, it will be titled the same name as the Google Meet with the code in parentheses. 

Step 5: To share the Jam with students for guided practice, click "Present now" and select "A Chrome tab".

Step 6: After selecting "A Chrome tab", you will be given a choice of tabs to share. Choose the one that has the Jam.

Step 7: After sharing the Jam's tab, click over to that tab. You will see an alert saying that you are sharing that tab and a button to stop sharing right above the title of the Jam.


I love Jamboard, but I am not an expert. For some great resources on Jamboard, follow my friend Tom Mullaney on Twitter and check out this YouTube playlist he created showing you how to use all the cool Jamboard features.

If you have any questions and would like a follow up, contact me via Gmail or Hangouts at ajuarez@techcoachjuarez.com. If you would like to unsubscribe from this blog, go to bit.ly/tcjinbox.

My book, The Complete EdTech Coach: An Organic Approach to Digital Learning, co-authored with my wife Katherine Goyette is due out in October/November of 2020. It will be published by Dave Burgess Publishing. Keep an eye out on this blog and on social media. Be sure to follow the hashtag #OrganicEdTech and #CVTechTalk for updates.