Monday, December 9, 2019

Some Chromebook Classroom Management Tips for Beginners


Chromebooks are in so many classrooms these days. Weekly, on the various educator Facebook Groups and Twitter Chats, I see people posting about how they just went 1:1 with Chromebooks and need some tips and best practices for getting started. With any new device or technique, it's a good idea to get the mechanics and routines down before diving deep into the pedagogy. For the beginners out there, here are some basic tips for managing students on Chromebooks.

Daily Routine

Your administrators paid thousands of dollars to get the Chromebooks. They will want to see them used. Early in my journey as a tech coach, this was the message I was to relay to teachers. Make it a routine that students login to the Chromebook and head to Google Classroom as one of the first things they do. Do not get all kids ready to learn and then have them go and get the Chromebooks and login. You will lose valuable instructional time doing this.

Chromebooks have a simple keyboard command to quickly logout at the end of class. Students will quickly learn to use the SHIFT + CTRL + Q command very easily. (To see more keyboard commands, use the CTRL + ALT + ? command.) This quick logout procedure makes wrapping up class easier. In my experience, using the last 3 minutes to logout and plug in Chromebooks is ample time to get kids cleaned up and onto their next class or activity.

In the Midst of an Activity

Keeping kids on task when introducing a new tool like Chromebooks can be challenging. Often, kids are used to using technology only as a toy and not as tool for learning. This can lead to them veering off onto other tabs or apps. To help lessen this, here are a few of my ideas for getting kids to use to show readiness during the steps of a lesson.

I like to tell kids to "close the lid". This is preceded be me showing on my projector screen or TV where they should be. I have them "close the lid" or simply close the Chromebook to signify they are at the right place and are ready to move on. Doing this will not log them out or shut the Chromebook off. This prevents kids from veering off or wandering onto other tabs, sites or apps. When all kids have closed lids, I instruct them to open it back up and it will be right where they left off. This is one of the many great features of Chromebooks. The reboot time is only a few seconds.

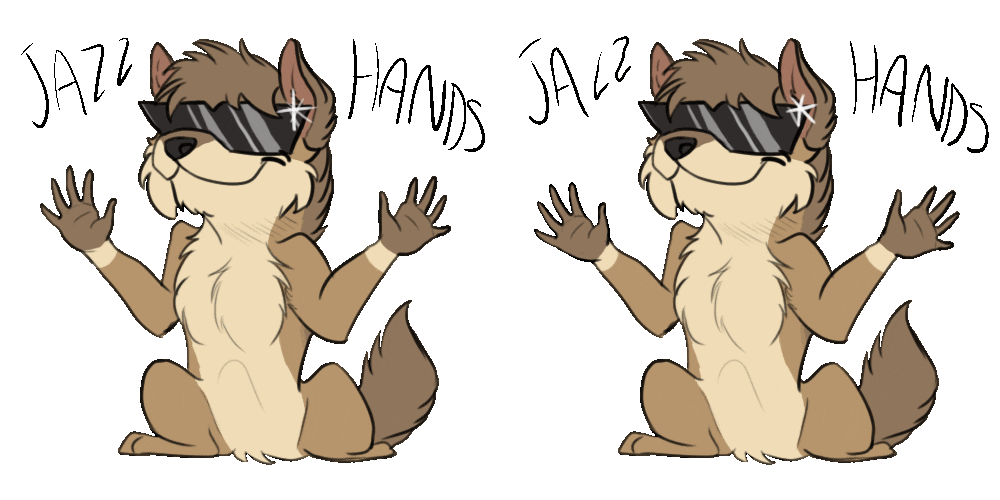
A physical motion, to show readiness, I like to use is called "jazz hands". This means when kids have completed a procedural task, and to show they've arrived, I ask them to show me "jazz hands". At that point, they have their hands off the keyboard, waving their hands like "jazz hands". This helps prevent unauthorized, short term Chromebook wandering. In my experience, younger kids think this is fun.

Feedback tokens is another idea I have implemented throughout my instruction regardless of technology. With feedback tokens, I set a "quota" daily based on the activity. Students must elicit feedback from teacher as they work to earn tokens. The may also earn tokens by following procedures, staying on task and being on the correct app or page. For example, in the Fast and Curious Eduoprotocol, students play multiple rounds of Quizlet Live, Quizizz and do sketchnotes. They receive tokens for joining the games as well as completing sketchnotes.


Tuesday, December 3, 2019

My Spin on The Fast and The Curious EduProtocol


When working with English learners, or any learner, building vocabulary is essential. Growing up in the 1980s and 1990s, I was usually given a list of terms and told to look them up in the dictionary. For students today, this simply will not do. Today's kids do not know the world without the internet and have likely not used dictionaries or glossaries much. Kids nowadays are wired differently than my generation and need a different approach to building vocabulary. To this end, one of my favorite strategies is the Fast and Curious EduProtocol.


Fast and Curious uses different formative assessment apps such as Quizizz, Kahoot, GoFormative, Socrative, etc. to gamify vocabulary and essential skill building. The idea is to get students interacting with vocabulary and or essential skills often with multiple repetitions daily and weekly.

My spin on the Fast and Curious EduProtocol smashes together Quizizz, Quizlet and whiteboards. In a 50 minute class period, I want students interacting individually and collaboratively multiple times in a digital and analog manner. Take a look below at the structure of this activity.

Prep (20 minute)
- Create study set in Quizlet. Be sure to include images with each term. Quizlet provides suggested images that are Creative Commons.
- Use same terms and definitions in Quizlet to create a quiz in Quizizz. Be sure to use same images too. (Copy image address from Quizlet and paste into each Quizizz question)
- Post links to Quizlet study set, Quizlet Live and Quizizz in Google Classroom

Facilitation:
- Students login to Google Classroom and open Quizlet study set link
- Quizlet Solo: Students get approximately 7-10 minutes to interact solo with the study set and play the games to become quasi-familiar with the terms. Students may take notes during this time if they choose.
- Quizlet Live: Students will play three rounds of Quizlet Live (10-15 minutes) to collaboratively interact with the terms and have opportunities to begin speaking and listening.
- Quizizz: Students will play Quizizz to assess initial understanding of terms. They will replay this quiz throughout the week to show growth and mastery (10 minutes)
- Speed Sketchnotes: Use whiteboard walls, personal whiteboards or paper/pencil to facilitate speed sketchnoting. Put kids in groups of 2-3. One partner is always the scribe. The other partner(s) explain the scribe an assigned term and have them sketch on the whiteboard or paper. Rotate jobs for each term. Each term should be given roughly two minutes. Due to time constraints, assign only the 4-5 most important terms. (10-15 minutes)

In a 50 minute period, students will have gotten 6-10 repetitions with the vocabulary terms. The first time you attempt this multi-layered activity, expect some hiccups. As students get used to the flow throughout the year, it will improve and you will see students beginning to enjoy vocabulary and essential skill building.

Tuesday, November 5, 2019

Quizlet Live Puts Smiles on Faces During Vocab Building


A few weeks ago, I had the privilege of co-teaching a week-long lesson on Medieval Manor Life in a 7th grade class. To kick off the lesson, the teacher and I adapted the Fast & Curious EduProtocol, Quizizz version, to include Quizlet. As most of students are English learners, developing vocabulary is a must. The smashing of Quizizz and Quizlet was a great help in doing that.

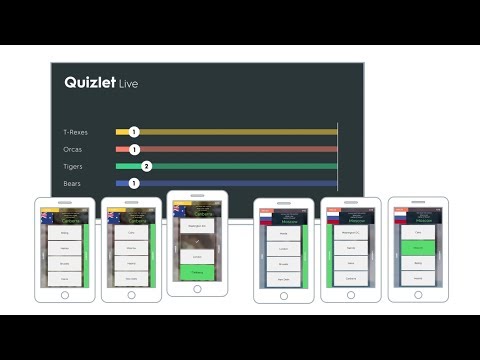
In a nutshell, students individually spent 7 minutes on a pre-made Quizlet study set getting to know the vocabulary cold turkey. When 7 minutes of solo practice was up, they moved into 3-4 rounds of Quizlet Live. Quizlet Live randomly groups students into teams of 3-4. When the game begins, each member of the team has a few potential answers, but only one actually has it. The team is forced to collaboratively discuss the prompt or vocabulary and determine which member has the right answer and submit.

I could go into all the details of the mechanics of Quizlet Live, but what really stood out to me was the smiles on faces. This lesson took place on a Monday morning. The energy in the room felt more like a Friday. The conversations were organic and not forced. The feedback from Quizlet to teams who made mistakes was instant and you could hear kids talk resiliently about not missing that one the next time.

This class had a couple of students who are on IEPs. An aide is also present for additional support. The teacher discussed with me beforehand the accommodations we would need to make and tried to plan scaffolds to help these kids fully interact in the activity. Credit to those two kids, none of the accommodations were necessary. The aide stood back and let them jump it. They fully participated. What was most encouraging was the looks on their faces. These are kids that often feel left out from interactive activities, but in this Quizlet Live session, they felt like part of a team. They felt needed and wanted like never before. Both were beaming the entire activity. Other kids were psyched when they found one of these two ended up on their teams for a new round.

In a nutshell, Quizlet Live did create a boisterous atmosphere. Not all teachers are used to that, but in this case, the learning was collaborative, authentic and two kids who don't normally fully engage felt proud to be part of the team. My question to you is, who are those kids who might feel left out and how may you leverage tools like Quizlet to help make them smile and feel included?

Friday, November 1, 2019

The Google Certified Educator Level 1 Exam Experience


Image result for google certified educator level 1

Since I became a Google Certified Trainer in 2017, I have coached 89 teachers to earn Google Certified Educator Level 1 status. Seeing the sense of accomplishment on an educator's face when they pass this test is intoxicating. This exam is no joke. It is quite rigorous. Seeing the clock count down as you navigate the multiple choice questions and performance tasks can be a little nerve racking. 

In my experience, I have noticed some trends in what people say when they take the exam. One common expression is "I didn't know I could do that with Google. I am learning so much." This expression has led me to tell teachers the best way to prepare for the exam is to just take the exam. Pass or fail, you will learn a bunch. Don't worry, if you fail, you can retake. In my experience, nearly all who've retaken the exam have passed it the second time. 

Another expression I hear often is "I am totally going to try that in class tomorrow." As mentioned earlier, you learn a bunch during the exam. It spurs your thinking and gets educators coming up with ways to apply their learning to their classrooms immediately.

One of my favorite common expressions comes after they've passed the exam when they say "Adam, when do I get to do level 2?" This is a powerful statement because it speaks to the capacity and confidence built by passing the exam. This small win builds upon itself and fuels teachers to seek out further professional learning on their own. It builds intrinsic motivation to constantly improve. As educators, it's our job to learn, and the learning is so much more valuable when its something we are intrinsically motivated to do.

Here are a few of my tips for passing this exam.
- Make sure you have at least three hours of uninterrupted time
- Have snacks and drinks
- Have a stable wifi connection
- Use a computer you trust
- You must have a working webcam
- Have a notepad or dry erase surface handy to jot down quick notes during exam so you don't always have to switch back and forth between tabs.
- Google anything you don't know
- Bring any notes from trainings you've attended
- Take the exam with a group of friends of colleagues (Groups of 5 are ideal as the test has been known to glitch when too many devices are running the test from the same wifi access point)
- Read the questions carefully as the answers are often in the details of the question
- On the multiple choice portion, make sure to scroll to the top to see how many choices it wants you to select. Often, the screen scrolls down for whatever reason and the amount of choices it wants you to choose is not seen.
- Mark every question and task for review. This means, at the end, you are able to go back and check your answers. If you don't mark for review, you cannot go back and double check.
- Try to get the multiple choice finished within the first hour. You want to have at least two hours to tackle the 11 performance tasks
- To copy and paste, don't right click, use the keyboard shortcuts CTRL C &V.

Apps Performance Task Hints
- Hangouts: Know what how to screenshare, add to Calendar
- Calendar: Create new calendar
- Docs and Sheets: Leave direct comments
- Sheets: Insert chart
- Classroom: Assignment with make a copy for each student
- Groups: Create a group
- Drive: Create folders
- YouTube: Create playlist and share the whole playlist
- Gmail: Create labels and move messages to labels
- Tasks: Create task and add an email to Tasks
- Sites: Add text, Docs and images from Drive
- Forms: Different question types and insert YouTube videos

For further training click on the links below for resources from Eric Curts, Kasey Bell and myself.

Friday, October 11, 2019

My Favorites: Formmule to Automate Feedback


Image result for formmule


When it comes to giving feedback, speed is of the essence. As an instructional technology coach, when walking classrooms or doing observations of teachers, the quicker they get my feedback, the quicker they can act on it. Speed of feedback also helps build relationships with teachers. If you walk through a classroom and leave feedback days later, the teacher feels neglected. As a classroom teacher, when someone came in, I couldn't wait to see their thoughts on what they saw. Something as simple as a sticky note on the way out went a long way.

In my role as an instructional technology coach, I use sticky notes for quick, informal feedback. When I am observing a teacher implement a strategy on which I've coached them or during more formal walk-thru's, Formmule is my jam. For this type of feedback, I use a Google Form with three simple questions: What I Saw, What Went Well, Next Steps. I fill in paragraph text for those three questions during the observation. Formmule, upon clicking Submit, will immediately email the contents of the notes I wrote to the teacher.

If you don't want all the notes you wrote sent to the teacher, you can configure that in Formmule. Here are some steps to help you get started.

1. Create form
2. Create drop-down question with teacher email addresses
3. Create your feedback/notes questions
4. Connect form responses to a Google Sheet
5. In Sheets, go to Add-ons and add Formmule if you haven't already
6. Configure Formmule

Configuring Formmule can be tricky. Take a look at the video below to see how I have done it. This video shows you simple way to get started.


Thursday, October 3, 2019

#EDUProtocols: Get Started With Thin Slides


Eduprotocols can be quickly summed up as pedagogical frames that are quickly planned, can be repeated frequently and all you need to do is switch out the content. One of my favorite EduProtocol catch phrases is "Teach better, work less".

In the recently released EduProtocols Field Guide Book 2, the Thin Slides protocol is featured. Having the honor and privilege of being trained this summer in this protocol by co-author Jon Corippo, I have come to see and learn that Thin Slides is a great first step with #EduProtocols.

As an edtech integration coach, I am always looking for simple ways to incorporate technology in classrooms that are pedagogically sound and not scary for teachers. Eduprotocols, Thin Slides in particular, covers both of those bases. At this point in the school year, we are beginning to implement the Iron Chef protocol, but our first step towards getting to Iron Chef has been the implementation of Thin Slides.

Thin Slides have whet teachers' appetites for more tech and Eduprotocols. I sold Thin Slides as a method of quick, formative assessment that gets ALL learners listening, speaking and presenting. One of our major district graduate outcomes is that of being a powerful communicator. Teachers saw Thin Slides as an easy step towards building their communication skills. With a high population of English Learners, Thin Slides is an easy way for teachers to help them with listening and speaking in the English language.

For those looking to get started with Thin Slides, here is MY beginners guide.

Setup
- Create slide deck quickly adding slides using CTRL + M
- Title slide: Put your prompt as title. Use subtitle for sentence stem if necessary Set slide deck permissions to anyone with link can edit- Post slide deck as announcement in Google Classroom (Be sure to change permissions so "anyone with a link" can edit.)

- Assign students a slide number


Facilitation
- Instruct students go to their assigned slide number and type name
- When names are on slides, instruct students that they will be adding ONLY one word and one picture to their slide (Remind students to STAY ON THEIR SLIDES and not look at others' slides. This may lead to accidental errors on slides)
- Give students a 3-4 minute hard deadline to build slide
- For procedural purposes, when a kid finishes their slide, have them close their Chromebook to signify they are finished
- When 3-4 minutes is up, have all students close Chromebook and stand up at desks
- Project slide deck and each student presents micro presentation for 5-7 seconds

Other Tips
- Selectively banter with kids during presentation with praise, comments and affirmation
- Record, with tally marks, the ideas kids present to identify themes and trends
- After micro presentations, have students, in Google Classroom type what they said in their micro presentation as a comment on the Thin Slides Announcement
- After comments, have students read classmates' comments, choose one that is a different idea and type it paraphrased as a new comment.

Tuesday, October 1, 2019

Favorite Ways to Use GIFs with Coaches

Bitmoji Image

Being a geeky, techy educator, I absolutely love GIFs. They are so entertaining, but at the same time, they can be a valuable learning tool. For teachers and coaches, GIFs can jumpstart learning for those we serve. Check out some of my ideas for using GIFs as a coach.

As a connected educator, I have learned much be simply "YouTubing" how to do something. For people like me, this is great, but others, this may not be the best way. One of my go-to's for coaching is screencasting. I screencast a how-to video, put it on YouTube and send a link to teachers. Some teachers, though, prefer a more concise resource. This is where GIFs come in handy. Instead having to watch an entire video, GIFs can quickly get right to the point and they repeat in a loop.

Screencastify
As mentioned earlier, I screencast how-to videos. To this end, the Screencastify Chrome Extension is my go-to tool. The paid version of Screencastify allows you to download your screencasts as an animated GIF. When I screencast short, concise skills, instead of publishing to YouTube, I download the screencast as a GIF and embed into emails, blogposts and slide decks. Take a look below to see how.


GIFit!
I am a big proponent of working smarter, not harder. We don't always have time to create our own screencasts. YouTube is full of already-made screencasts of many of the skills teachers need help with. If this is the case, the GIFit! Chrome Extension can help you make GIFs from targeted parts of YouTube videos that contain skills you want to share. Simply add this extension to Chrome and a GIFit! button will soon appear on YouTube videos. When I use GIFit!, I make it a point to always include a link to the entire video to give credit to the video creator. Take a look below to see how. 


Saturday, September 28, 2019

My Favorite Google Calendar Tip for Coaches


As an instructional technology coach, keeping up with my schedule is part of the daily grind. My approach to tech coaching is an organic approach. To this end, I try to be in classrooms at least 80 percent of my day. Maintaining my schedule is essential to this approach. Google Calendar along with Google Keep and Google Tasks help me make sure I know what I have to do and where I have to be. Google Calendar is a very robust, yet easy to learn tool. A popular feature among coaches is the Calendar appointment slots. In my experience, adding the school bell schedules has been my best Google Calendar trick. Adding school bell schedules require a little bit of work to set up, but once you have them in, planning in-class coaching with teachers becomes much easier.

Most schools don't have a bell schedule that can be imported directly to your Calendar. This is true of the schools I serve. I took it upon myself to manually input these schedules into Google Calendar.
The first step is to create a separate calendar for the bell schedule and add all the "class periods" to that calendar. In the GIF below, see how to create a new calendar.


To expedite the process, become a master of the REPEAT function in Calendar. This will allow you to create a "class period" once and make it repeat for the entire school year. In the GIF below, repeat the steps for each "class period" in your bell schedule.


After inputting all the repeating class periods into the Bell Schedule in Google Calendar, scheduling with teachers becomes a breeze. If I want to coach a teacher who is teaching 3rd period, I know longer need to know the exact times for the period to begin and end when entering this coaching session into the calendar. All I need to do is open the 3rd period event and duplicate it. I will then edit the duplicate with the teacher's name and purpose for the coaching. This makes scheduling teachers on the fly much easier. Take a look at the GIF below to see how.


Thursday, September 26, 2019

Canned Responses in Gmail for Feedback


Image result for canned responses

In education, quick, meaningful feedback is so important. Whether you're a teacher giving feedback to students, admin to teachers, coaches to teachers and or district admin to site admin, automating and expediting the process is a good idea. The quicker someone receives meaningful feedback, the quicker it can be acted upon and work can continue to iterate. As an edtech integration coach the past five years, my feedback tools have varied and evolved. I've used Google Forms with Formmule to send quick emails to teachers during walk-throughs. I also use custom sticky notes (click here for a template) to leave quick written, personalized feedback. When doing longer observations, Canned Responses in Gmail have been my go-to.

Recently, as I began working systematically with entire departments on implementation of EduProtocols. I've developed a cycle of introducing a protocol in their PLC and scheduling in class demos with quick turnarounds for observation and feedback. During the observations, I use Canned Responses in Gmail. Though not completely different using a Google Form with Formmule, it has  advantages. Using a Form is more of one sized fits all approach to providing feedback. When working with different departments on different EduProtocols, creating a canned response for each department or protocol makes the feedback more easily personalized.

Take a look below to see how to create a Canned Response in Gmail.


Start by typing a subject and, in the body, type areas for you to fill in. From there, click the three dots in bottom right corner and select (depending on your domain) Template or Canned Responses. Next, select save draft as template. You can then close the message window. When you want to use the Canned Response, compose a new email, go back to the three dots, click Template or Canned Response and select the name of the template you created.

Wednesday, September 25, 2019

My Favorites: Save to Keep Chrome Extension


Image result for save

One of my favorite Chrome Extensions is Save to Keep. I use Google Keep daily for both personal and professional tasks. On a pretty regular basis, I find some amazing articles, social media posts, blogs, etc. that help me improve my practice. The problem is I don't always have time to sit down and read the entire article and really dig in and glean some great ideas. I don't want to bookmark every link I encounter. That would make my bookmarks bar a mess. To ensure I can save that link in a convenient place to check out later, the Save to Keep Chrome Extension is one of my best friends. 

You can easily find it in the Chrome Web Store. (Click here to access it.) Add it to Chrome and it will soon appear among your extensions on your Chrome toolbar. This extension will allow you to save any webpage on which you are browsing. To do so, click the extension. A small drop down will appear at the top of your screen with a link to that page and it allows you to type a message on a Keep note. To access later, go to Google Keep and you will see a note with the link and any message you added. See the GIF below to see how this works.


There is a similar functionality for Chrome on an Android device. On an Android device, you don't need an extension. Simply click the three dots in the top right of the browser window, click Share, then select Keep. Like the extension on your computer's Chrome browser, this will save the link to a note in Keep. See the GIF below to learn how to save a link to Keep on an Android device. On iOs, click the share menu in Chrome to accomplish the same thing.


Related image
Share Menu button for iOs

Wednesday, September 4, 2019

EdTech Coaches on Walkabout

Image result for walkabout aboriginal
My wife Katherine Goyette and I have had the honor and pleasure of presenting our "Walking Coach" session at ISTE and various CUE events. In this session, we emphasize the importance of walking classrooms and being visible to the teachers and students you serve. As I put this into practice, I like to say, each day, I am going on walkabout.

According to Wikipedia, walkabout is a rite of passage for male Aborigines. This usually takes place during adolescence where they wander in the wilderness for up to six months to make a spiritual transition to manhood. As an edtech coach, going on walkabout transformed my practice tremendously.

In the aforementioned "Walking Coach" session, I share a story of my early days as an edtech coach. During those early days, I was excited to train teachers on the wonders of edtech, but I became lonely and isolated as days passed with the phone not ringing. I expected teachers to reach out to me. To combat this, I made a commitment to walking classes as much as possible. I've come to call this change in approach going on walkabout.

It was on this initial walkabout where I began seeing teachers and students in their natural habitat. These casual observations allowed me to leave quick feedback and solve problems on the spot. Being visible in classrooms led to teachers reaching out and allowing for the planning of organic edtech integration.

For Aborigine adolescents, walkabout is usually a once in a lifetime experience. As an edtech coach, my first walkabout changed my practice forever, but unlike the Aborigine, an edtech coach's walkabout must be ongoing. I cannot be a one time deal. As school initiatives and staffs change, it's important to have a consistent walkabout schedule to roll with the changes during the year to better serve teachers and students' needs.

Tips for Jumpstarting an EdTech Coaching Walkabout
If you're a classroom teacher, encourage your edtech coach to come visit. Many new coaches tend to sit in their offices and develop PD. Help jumpstart their walkabout by inviting them to your classroom.

If you're an administrator, encourage your edtech coach to set a goal for seeing as many classrooms as possible per quarter. My ambitious goal is to see every classroom at my two sites at least once per month.

If you're an edtech coach, develop tools for tracking the classrooms you visit and leaving feedback. I have created a Google Site with a page for each of the 100 teachers I serve. On those pages, I record each visit and any artifacts of student work or teacher planning. In addition, I use custom sticky notes (I made mine on Vistaprint.com. Click here to access my template) for informal feedback and a Google Form with Formmule for automated, formal feedback.


Tuesday, August 20, 2019

Is Your Learning Space Student Friendly?


Those who know me well are aware of my passion for Fresno State Football. Much of my life has been spent at Bulldog Stadium. Over the past decade, the atmosphere at Bulldog Stadium has paled in comparison to the glory days of the 1980s through the early part of this century. The stadium was usually packed and the crowd was electric. Lately, it's been a pathetic sight to see countless rows of empty bleachers. To make matters worse, the last two seasons have been two of the most successful in school history, yet the fans still aren't turning up.

As we embark on a new school year, I invite you to reflect upon your learning space and how it truly meets the needs of the modern student. Is your space designed for maximum teacher comfort and efficiency or is it designed for that of the students? Is the seating flexible? Are the walls stagnant? Do kids walk in and marvel at the possibilities each day? These questions have guided me in my design of learning spaces. My Google Innovator Project, the Cardinal Innovation Center, is meant to be a model, student-centered learning space. It was designed with the needs of the modern student in mind. Click here for a quick tour.

In the case of Bulldog Stadium, fans complain about the inconvenient locations of restrooms and concession stands. With no tunnels, those sitting in the best seats closest to the field must scale approximately 100 steps to get to the top to access restrooms and concessions. In the Central Valley heat, early in the season, this will definitely make for an uncomfortable fan experience.

Sitting near the field makes for long walk up stairs to get to the restroom or concession stand.
Millenials and younger generations enjoy interacting with the game differently than traditional, older fans. They enjoy following the game stats on their favorite sports apps. They enjoy posting pictures of themselves and friends to social media from inside the stadium. These things are problematic as cellphone reception is extremely poor when 40,000 people are jam-packed into the stadium. The stadium does provide free WiFi, but it isn't a great signal and the bandwidth cannot handle the traffic.

The current state of affairs for fans at Bulldog Stadium, for me, serves a reminder for classrooms and learning space design. Is your classroom designed with your end users', students, needs in mind? Are moving around and accessing learning materials as inconvenient as the restrooms and concessions at Bulldog Stadium? Are you maximizing the use of technology in your room or is it token, surface level like Bulldog Stadium?

These are great questions for reflection. If you feel your learning space is trending towards the current state of Bulldog Stadium at all, contact you friendly, neighborhood tech coach for tips. Giving students a great learning environment is vital to maximizing pedagogy. Without a learning environment that meets the end users' needs, your great lessons and pedagogy will struggle to reach a large audience like the historically successful Fresno State Football Teams of the past two seasons.


Need ideas for improving the "student-centeredness" of your learning space, contact me at goljuarez14@gmail.com or visit cardinalinnovationcenter.org.


Thursday, August 15, 2019

Quick EdTech Tips for Starting a New School Year


I hope everyone had an enjoyable summer. I know I did. This summer was probably the most I have traveled ever. Now that summer has come to a close for 2019, the new school year is upon us. Starting a new school year is both exciting and stressful. We are excited to see students and colleagues again, but, at the same time, we can be stressed by meetings, PD and the rigors of curriculum and classroom set up.

Allow me to share with you a few edtech tips I use myself at the beginning of each school year. These tips are Google-centric, but if you are a Microsoft or Apple District, those platforms have similar functions.

Archive Old Google Classrooms

When a new year starts, go to Google Classroom and archive your old classrooms. To do this, on the Google Classroom home page where you see all of your classrooms, click the three dots and select archive. Don't recycle them. If there is an old assignment in an archived class, you can still reuse them in your new classes.

Try One New App/Strategy

If you're anything like me, you're constantly learning through a PLN, social media and conferences. This type of learning inundates you with new ideas and strategies. I advise not trying to implement too many new ideas, apps or strategies at once. Start slow with one at a time. Reach out to your tech coach for support. Once you and your students are comfortable, try another. For me personally, I am beginning the year with a few #eduprotocols and will implement more as the year wears on.

Clean Out Inbox

Early in the year, we tend to get more emails than normal. This can lead to a bloated inbox. Bloated inboxes can result in missed messages. Don't be an email hoarder. Take a few minutes and delete old messages you know you don't need. If there are messages you need to save, create labels (which are like folders) and move them for future reference to declutter the inbox.

Not every communication requires an email. If it can be said via text message, use text messaging instead of email. If you do not give out your cellphone number, use a messaging system like Google Hangouts to keep your number private, but still have a back channel for informal communication.

Clean Out Google Drive

Like the inbox, Google Drive can get cluttered. You may find tons of old files that were shared with you that are no longer needed. Delete them. If you don't want to delete, create an "Old Stuff" folder and move those things there to separate from files you use frequently.  Develop a naming convention system for files and folders. This will help searching Google Drive tremendously.

Unsubscribe from old Calendars

Throughout each school year, we are invited to view calendars from different initiatives, programs, teams, clubs and more. This will clutter your view of calendars in the left side toolbar of Google Calendar making it difficult to see and manage the calendars you need to see this year. If you hover your cursor over an "old" calendar, an "x" will appear. Click it to unsubscribe.

Add Bell Schedule to my Calendar

When working with kids in our classrooms, it is easy to lose track of time. As tech coach in my district, I have added the bell schedule to Google Calendar and shared it with the schools I serve. This was a little tedious, but now the calendars sync to my phone. I set each period to have a 3 minute notification before the end to remind me to start wrapping things up. This notification comes on my phone and my smartwatch. If you don't have a coach like me to set this up for you, feel free to message me and I can give you a hand (goljuarez14@gmail.com).

Set a Simple Reflection Challenge

Reflection is important for educators. The more I reflect on my practice, the better educator I become. This year, I have set a challenge for myself to take pictures of student work every day in addition to pictures of the work I do as tech coach. Each day, I take a few minutes and add those images to a slide. When the year is over, I'll have a 185 slide presentation filled with pictures of the work I have done. This helps me stay mindful to make sure I, the students I work with and teachers I serve are producing quality work. You don't need to do my challenge, but try something like writing a sticky note to yourself each day. Try blogging or even taking 5 minutes of quiet time to decompress.

Make friends with Tech Coach and or IT Personnel

If you're reading this, you have probably connected with this tech coach already. If I am not the tech coach at your site, find that tech coach. Being a tech coach can be a lonely job. We love it when teachers reach out. We have a lot to share and we love sharing.

As a tech coach and teacher, I work closely with IT personnel. This is a hugely important relationship. Making friends with these folks makes my life a lot easier. This relationship means I don't need to wait as long to get things fixed, connected or hooked up. In my experience, a box of donuts goes a long in building a relationship with IT personnel.


I hope everyone has a great school year and hopefully some of these tips were helpful!