Welcome back to school! Since we've returned to face to face school after distance learning, a frequent pain point I have heard from teachers is lack of student engagement. Holding all students accountable for participating is more essential than ever before. Instead of a select few who are randomly selected with popsicle sticks, Nearpod holds every kid in the room accountable for answering. Student answers are confidential and Nearpod's amazing suite of tools allows kids to engage with content and participate in learning like never before.
If you are new to Nearpod, let's take a look at how to get started for the very first time. Begin by heading to nearpod.com and click Sign Up. I recommend using Google, Microsoft, Clever or Classlink as seen below. If those systems are not what you use, use your school email address instead.
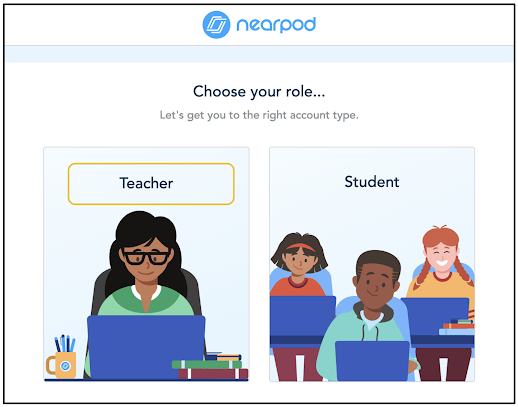
The next step is to choose your role. Be sure to select teacher. From there, you will have to agree to terms and conditions.
Nearpod is going to ask you for some details about your role. You may select multiple options in each category.
After entering information about your role, you are all set up. Below is what your Nearpod dashboard looks like. It defaults to the My Lessons tab. To get started quickly, click the Create a Lesson button.
To start building a lesson, click the Add Content & Activities button. An extensive menu of options will appear.
The Content tab of the Lesson & Activities menu gives you a wide variety of things you can add to your lesson. For the purpose of the blogpost, I will demonstrate the bare bones basics of creating a slide. Click the Slides option.
Immediately, a slide will load. If you look closely, it closely resembles what you are used to in Google Slides. If you are familiar with Google Slides, there shouldn't be much of a learning curve. After building your slide, in the bottom right corner, you can click Save to add it to your lesson or click Save and add new to save the first slide and immediately start building a new slide.
Your saved slides will appear as seen down below. From here, you can click on any slide to add further edits.
When your lesson is saved, back in the My Lessons section, hover your mouse over the lesson. Many options for facilitation and more are available. Live Participation is useful for conducting the lesson with students all at the same time like you would with PowerPoint or Google Slides. This option will generate a code for students to use to join the lesson. The beauty of this is that the slides appear on their screens as well as on your TV or projector screen. Students with visual impairments can find seeing the lesson easier in this way.
The Student Paced option allows students to navigate the lesson asynchronously. This can be used for homework, students who have been absent, enrichment, stations and much more. The link to a Student Paced lesson can easily be posted in the LMS of your choice.
This is just the tip of the iceberg with Nearpod. Now that you are able to get started for the first time, the next entry in this blog series will contain tips and tricks for adding videos and questions to a Nearpod lesson. Stay tuned!
If you would like to bring me to your school for PD, workshops, a keynote or training, click here to schedule an appointment to chat.
My book, The Complete EdTech Coach: An Organic Approach to Digital Learning, co-authored with my wife Katherine Goyette is now available on Amazon. Click here to purchase. It is published by Dave Burgess Publishing. Be sure to follow the hashtag #OrganicEdTech and #CVTechTalk for updates.

-1.jpg)


Welcome back to school! As we transition from distance learning back to face-to-face classes, student engagement remains a critical focus for teachers. Nearpod addresses this challenge by ensuring every student actively participates and their responses are confidential. With a versatile toolkit, Nearpod enriches learning experiences, allowing students to engage deeply with content. New to Nearpod? Start by signing up at nearpod and selecting your role as a teacher. Explore its features to create interactive lessons that cater to both synchronous and asynchronous learning environments.
ReplyDeleteI appreciate how Nearpod makes it easy to create engaging lessons that hold all students accountable.
ReplyDelete